Happytoru is reader-supported. When you click and purchase through my links, I may receive a small commission at no extra cost to you. Thank you so much for your support!
Have you ever found YouTube videos blurry or frustrating to watch?
If so, this post will show you how to improve video quality in just 5 seconds!
Read in another language
日本語|Japanese
Español|Spanish
Table of Contents
◆ How to Resolve the Problem
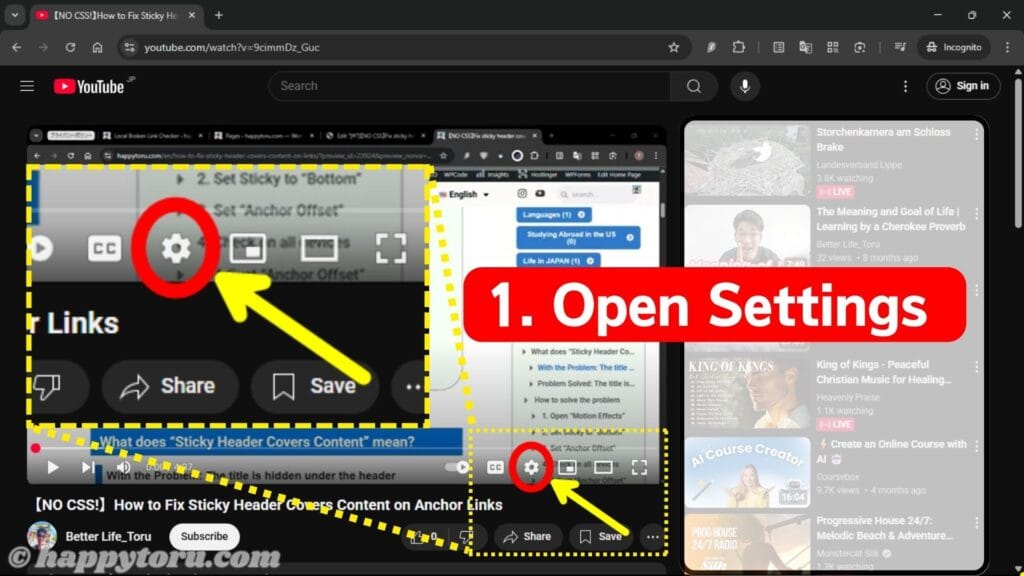
1. Open “Settings”
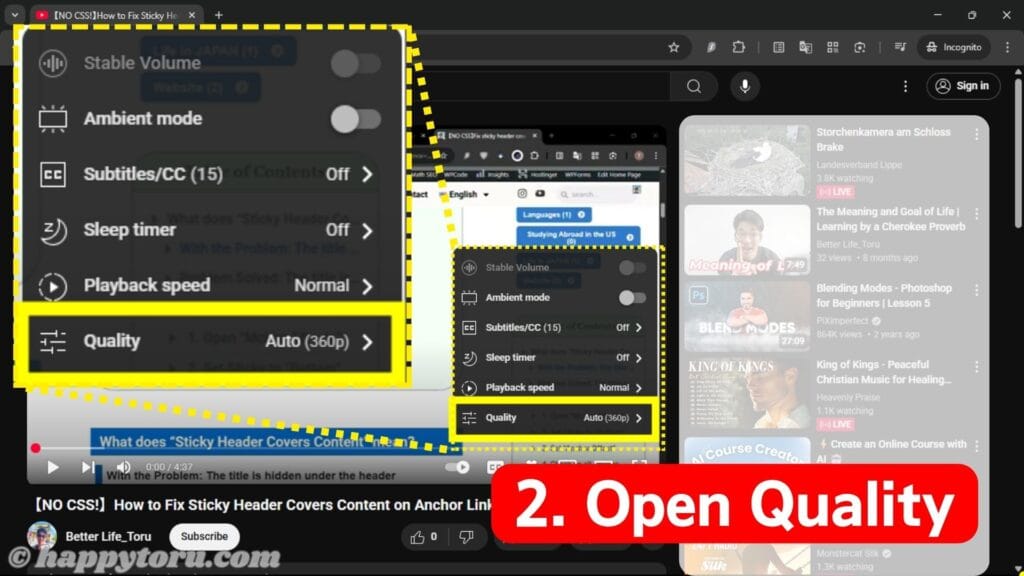
2. Open “Quality”
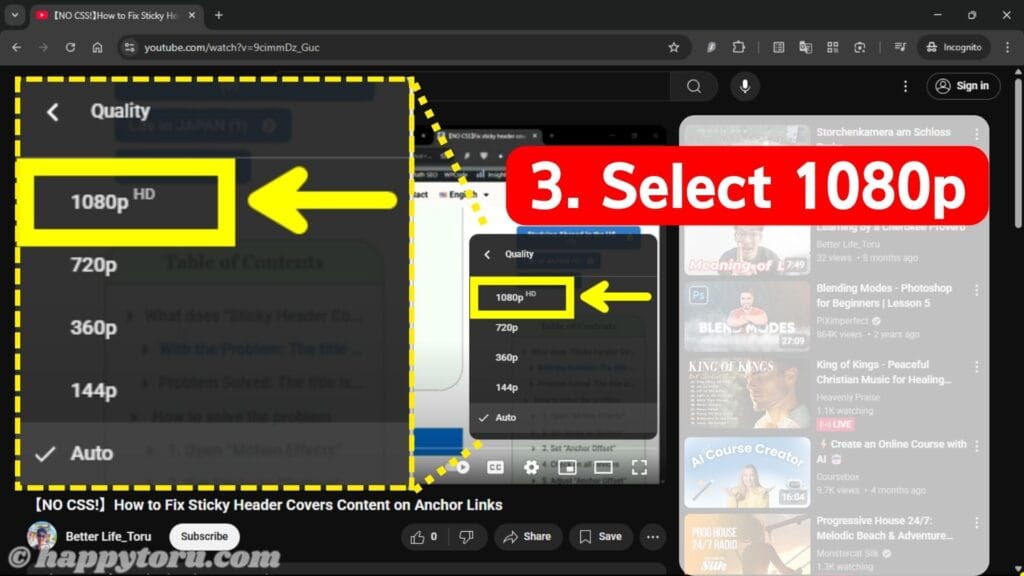
3. Change “Auto” to “1080p HD”
◆ Things to keep in mind when increasing video quality
Some videos may not support high resolution…
It consumes a lot of data
Loading speed may decrease
YouTube
Click here to watch the video ↓
目次
3. オーバーフロー(Overflow)を開く
a
基本情報
使う前にアクティベイトする必要あり
2.1. eSIMのメリット
How to Resolve the Problem
1. Open “Settings”
First, open “Settings” by clicking the gear icon.
2. Open “Quality”
Next, open “Quality” from the list in Settings.
3. Change “Auto” to “1080p HD”
Finally, change the video quality setting from “Auto” to “1080p HD”.
The difference between 1080p and 4K isn’t always noticeable, so if you’re concerned about data usage, 1080p (or even 720p) is usually good enough.
In general, anything 1080p or higher is considered high quality, so feel free to choose what you prefer.
The higher the video quality (resolution) is, the more data it consumes. (⇒ See below for details)
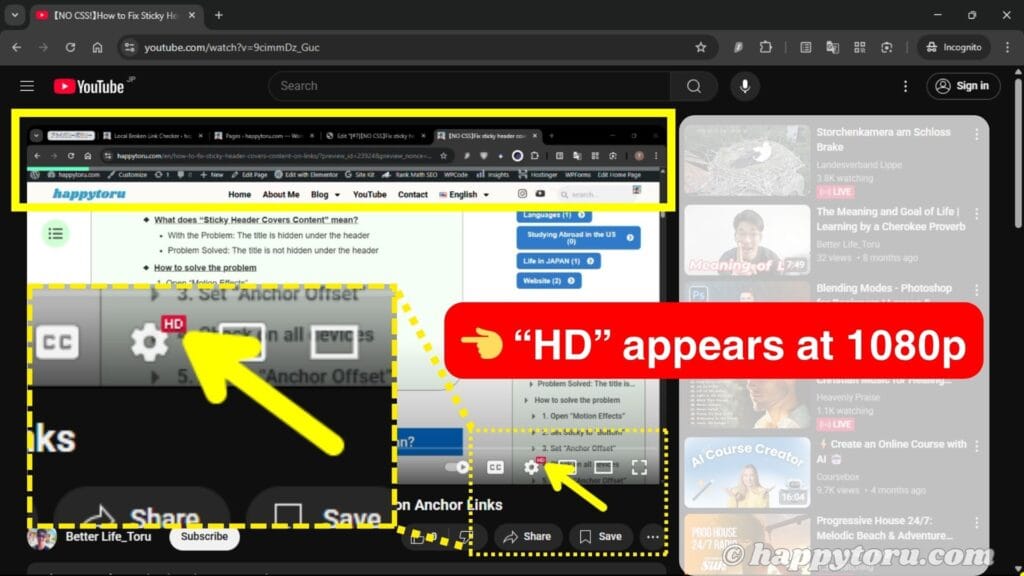
When you switch the video quality to 1080p, the screen will automatically refresh, and “HD” will appear at the top right of the gear (Settings) icon.
Now, you can enjoy crisp, high-quality video without the blur or stress!
However, there are a few important things to keep in mind when watching in high quality. Be sure to read the notes below before adjusting the video quality.
Things to keep in mind when increasing video quality
The following section outlines important points to consider when switching YouTube videos to high quality.
Be sure to review these notes before adjusting the video quality settings.
3 things to keep in mind
Some videos may not support high resolution…
It consumes a lot of data
Loading speed may decrease
Some videos may not support high resolution…
Changing the video quality to 1080p or 4K is only possible if the video was uploaded in high resolution.
Not all videos are uploaded in 1080p or 4K. If only up to 720p is available, it means the original video was uploaded at that resolution.
Older videos, in particular, often do not support 4K resolution.
If high-quality options are not available, it is recommended to watch the video at the highest resolution offered.
It consumes a lot of data
Higher video quality, i.e., higher resolution, consumes more amount of data.
For those with limited data plans—such as a 3GB monthly limit—it is recommended to watch videos in 720p or lower when not connected to Wi-Fi in order to save data.
Below is a comparison of estimated data usage for 720p and 1080p video playback. (Data source: firsty, GIGSKY)
Resolution (Quality)
Data usage per hour
Viewing time with 1GB
720p
1.2–2.7 GB
~ 40 minutes
1080p
2.5–4.1 GB
~ 20 minutes
Loading speed may decrease
When the network connection is poor, setting the video to a high quality like 1080p may slow down loading speed. This is because higher-quality videos require faster internet speeds.
Also, even if the quality is manually set higher, it may automatically return to lower resolutionwhen the video reloads or a new one starts.
I created my website and started YouTube channels in my senior year of university.
To achieve my life goal: “making many people happy,” I decided to learn how to create a website from scratch through YouTube and the Internet, then launched my own site, “happpytoru.”
I write blogs on various topics: travel, language learning, tips for living a fulfilling life, and more. Also, I have multiple YouTube channels to share about traveling, languages, and life tips.